Friday, December 28, 2012

Tres Leches Strawberry Cake

I know you are drooling over this one..just by looking at the pictures!!! Soft creamy whipped cream over a amazingly moist cake (almost custard like!) topped with fresh strawberries....I am with you! Love Love Love it!!!
I had never had or made "Tres Leches Cake"[ 'Tres' means Three and 'Leches' mean Milk....probably all must have come across these words...living in 'Spanish' translated America!] . I came across this one...on  a Facebook Foodie Community "Bon  Appetit'...One of the fellow members,Shalmali Thakur-Pradhan, had posted the cake recipe on her blog (Bakasoor.blogspot.com).Check the detail recipe here--
http://bakasoor.blogspot.com/2012/12/tres-leches-cake.html

It was a very pretty looking ....luscious...tempting cake..and I couldn't resist baking it! Since Christmas was right around the corner...we celebrated Christmas with this aweesomeely delicious 'Tres Leches Strawberry Cake'!!!

I pretty much followed the instructions on Shalmali's blog...with few modifications.

1) Bake a cake with "White Cake " Mix. I used 8inch round pan. I made 1- 8inch round cake and 6 cupcakes
After the cake bakes...let it cool for 1/2 hr or so...transfer to a disposable aluminum pie dish (which you can cut out after soaking the cake in 3 milks)
2) Poke the cake with fork all over and soak it in 3 milk mixture. Let it soak for 1 hour. Keep the cake in the refrigerator for that time.
 3) Cut out the sides of the aluminum plate and top with whipped cream and decorate with fresh cut Strawberries.Done!
Indulge into the rich, moist, milky, whipped creamy, strawberry goodness!!


Thursday, December 27, 2012

My Sizzling New Kitchen!

Christmas break started ...and we were wondering where to go???  The places that were warm were far away...and the near ones were going to be as cold as Columbus. All in all ...."M" and I scratched our heads..and still couldn't decide on a place to go for the break...
But then...An Idea came by....why not take up some home renovation project??? It will be fun!
I was wanting a "Kitchen Backsplash"...for obvious reasons...the oil was flying to the walls...the food was spluttering on the walls behind the stove...and those marks didn't look so pretty.
We studied on the internet about the Kitchen Backsplash...went through all the steps...materials, tools that were needed and finally decided on what we wanted to do.
The project went well...it wasn't as easy as shown in the videos on the net...but 'do-able'. It was fun...hard work...but in the end...My Sizzling New Kitchen Looked Gorgeous!! "M' did most of the work...I was helping him around here and there.

3 Days of Hard Work later.... The Kitchen Backsplash was all done!
Picture on the left is "Before The Kitchen Backsplash" and One on the right is "After the Backsplash " was done.


The "glass mosaic" tiles that we used..gave a 'Modern' look to the Kitchen!

I will be Cooking and Blogging soon..from the Newly Updated "Sizzling" Kitchen..See you then!
Deepti


Wednesday, December 19, 2012

Brown Rice Idlis and Dosa

Brown Rice....how many times have I decided to start using it..mainly as "Rice"....but somehow my palate isn't ready...and I keep postponing it.

Few months ago, when "E' was performing a dance at the Ganapati festival, we had the crispiest, yummiest Dosa at one of his friends house. 'V' makes excellent South Indian food.I was amazed at how delicious and crispy the Dosa was..and could hardly make out....that it was made with brown rice, neither by color nor texture nor taste.
Couple days ago....I made up my mind..and bought a 2lb bag of Brown Rice at Walmart for $ 1.32(good deal ha!!)
Inspired by "V''s Brown rice Dosa....I decided to make the batter and mark the beginning of "Brown Rice" era at home!


Batter--
2 Cups Brown rice
1 Cup Urad Dal
Water to soak
Soak the Rice and Daal separately in water for 5-6 hours.The water should cover the rice/daal and little over it.
Grind into a fine paste with the water that it was soaked in.So the rice doesn't loose any essential vitamins.
Let it ferment overnight.I preheat the oven to 'warm' for 5 mins, TURN IT OFF, before I put the batter in a large vessel and keep it overnight in the oven to ferment.
After it ferments and fluffs up...add salt to taste.
Idlis-
Steam the batter in idli stand for 15-20 mins. Serve hot with sambar and chutney


Dosa--
Preheat non stick pan/tava
Smear oil with a paper towel on the tava.
Spread a spoonful batter onto the tava and let it cook on low-medium flame till it browns and crisps up.
Serve immediately with Sambar and chutney.


 Sambar--

1 Cup well cooked Toor dal/masoor dal
1/2 cup Veggies like drumsticks, pumpkin, raddish, gourd,potato etc
1 tomato sliced
1/2 onion sliced
1/2tsp mustard seeds
1/2tsp Cumin
1/2tsp Methi seeds
2-3 tsp Sambar masala ( I used MTR brand)
1tsp red chili powder
1/2tsp turmeric powder
1/2tsp Tamarind concentrate
1/2tsp Jaggery
Curry leaves
2 Red whole chilies
2 tsp oil
salt

Heat the oil, add the mustard seeds, cumin,methi seeds, curry leaves, red chili.Fry for few seconds.Add the onion,tomatoes and veggies and fry for 2-3 mins.
Add turmeric, sambar masala,chili powder and the daal.
Add enough water to make desired consistency and then add the remaining ingredients. Let it boil for few minutes till the veggies cook.Serve hot!


 Coconut-Cilantro Chutney--
1/2 cup fresh coconut
1/2 cup fresh cilantro
3-4 green chilies
1/4tsp ginger
1 clove garlic
1/2tsp cumin
salt
sugar
few drops lemon juice
1tsp oil,1/2tsp mustard, curry leaves for tempering

 Grind coconut,cilantro,chilies etc into a fine paste in a blender. Heat 1tsp oil add mustard seeds and curry leaves. Let it crackle and then add to the ground Chutney.


Tuesday, December 18, 2012

"Sweet Treats"- Pineapple Sheera

Past week and a half has been pretty rough.'M' was out for work for 4 days..the kids were sick...then the Connecticut tragedy got me shaken to the core...and..illness in the family in India...All in all... I don't feel like doing much...

I  had made this Sheera for lunch before 'M' left for Mexico last week.Even a simple thing like Sheera with variations...can become a whole new dessert!


Ingredients:
1) 1 cup rava/sooji/cream of wheat
2) 1&1/2 cup water
3) 1 cup whole milk
4) 1/2 to 3/4 cup sugar
5) 1/4tsp Cardamom powder
6) 1 pinch saffron
7) 1 pinch salt
8)1/8tsp nutmeg powder
9) 3/4 cup butter/ghee
10) 1/2 cup Canned pineapple pieces(bite size)
11)4tsp sugar to saute the pineapple
12) Dried cranberries

Method:
1) Boil water+milk together
2) Roast the rava in butter/ghee till golden in a deep pan
3) Add the hot water+milk to the roasted rava,mix.Cover and steam for 1-2 mins on low flame
4) Add saffron,cardamom,nutmeg,sugar,salt and mix well. Keep aside.
5) Saute the pineapple pieces in 4tsp sugar for 3-4 mins.
6) Mix the sauteed pineapples in the sheera. Mix
5) Garnish Dried cranberries
6)Serve warm.


Thursday, December 6, 2012

Baklava

Which 'Sweet' is Sweet,Crunchy,Buttery,Gooeey,Nutty...all at the same time?? And the answer is.............BAKLAVA is a 'sweet lovers' winner for sure! The variety of textures and depth of flavors it offers is just phenomenal and promises to satisfy the 'sweetest of the sweet tooth' :))

I made these for a friend, for her to take to her "International Business class about Turkey" as a treat after the presentation. It was a great 'project" for me..to estimate the cost, estimate how much each ingredient I will need to make the 50 pieces that she needed, how many pans and what size pieces to cut! All in all...It was a good brain workout:)
Ingredients:
1 lb Athens Fillo Pastry Sheets (I used 30 sheets)
1 stick unsalted butter
Butter flavored Cooking spray

Filling:

10 oz Almonds
10 oz Walnuts
2/3rd cup Sugar
1tsp Cinnamon powder
Zest of 2 lemons/ zest of 1 orange
1/2tsp salt
Few pieces of Pistachios for decoration

Syrup:
1.5 cups  Sugar
1.5 cups water
3/4 cup Honey
2 slices of lemon
few drops Rose essence


1) Thaw the Fillo sheets as per packet directions
2) Toast the Almonds and Walnuts separately in the oven/ microwave till slightly toasted ( 4-5 min in microwave, remove every minute and turn the nuts...otherwise they burn) Let them cool
3) In a blender pulse the nuts till coarse along with sugar, cinnamon, zest salt etc.OR chop nuts with a knife.
4) Preheat the oven to 350F
5) Brush a 8in x 12in Pan with butter or coat with butter flavored cooking spray
6) I did this pattern for assembly---(15 sheets Fillo---then nuts layer---then 5 sheets fillo---then nuts layer---and finally 10 sheets fillo) 
Details-Place1 sheet of fillo on the bottom.Spray with cooking spray/ brush evenly with butter.Repeat for the 15 sheets. Then spread half of the nuts mixture. Then place 5 fillo sheets (spreading butter in between each sheet). Then spread remaining half of nuts mixture.Then the 10 fillo sheets (spreading butter in between each sheet) and on top of the last sheet.
LIFE SAVER:  I sprayed the butter flavored cooking spray on the sheets that had broken.Spreading butter on those was really hard.
7) After the assembly, cut with a sharp knife into 30 square pieces ( 6 vertical lines by 5 horizontal lines) Place a small piece of Pistachio in the center of each piece.
8) Bake uncovered for 40 mins till golden
9) Remove from oven and let it cool uncovered for 1and 1/2 hrs
10) Syrup: Mix sugar, honey, lemon slices, rose essence, water in a pot. Bring to a boil. After it comes to a boil...boil for 10 mins. Let it cool till lukewarm
11) Pour the warm syrup on the baked Baklava. Let it soak overnight or several hours. Cut again on the same lines as  before and serve at room temperature.

Store at room temperature for upto 5 days. 

Same Filling as above in the Fillo Cups, garnished with dried Cranberry and topped with 1 tsp sugar-honey syrup


Wednesday, December 5, 2012

Chicken Kheema balls in Indo-Chinese Gravy

Like always...I overestimated how much Chicken Kheema (Ground Chicken) I would need for the Kabobs that I made for a party (http://www.my-kitchens-aroma.blogspot.com/2012/12/chicken.html) and bought like 3 lbs of it!! I had to use up the leftover Kheema...and well ....make up a yummy Lunch for the weekend. I made these delicious "Indo-Chinese Style" Curry/Gravy with Chicken Meat balls.The Spicy-Tangy Curry with the Chicken balls was a tasty lunch deal!
 "E" loves the meat balls and he had them with .any .guesses...YES.. his favorite NAAN!!


Recipe:
Ingredients:
Chicken Kheema balls--
1lb minced chicken/kheema
1 medium onion chopped finely
1tsp ginger garlic paste
1tbsp chopped cilantro
2tsp Roasted sesame seeds
2tsp Kitchen King masala
1tsp Sambal Olek paste
1tsp Ketchup
2tsp chili powder
1/4tsp turmeric
1tsp cumin-coriander powder
1/4tsp black pepper
1 egg salt to taste
Oil for pan frying the Chicken balls
oil to brush hands

For gravy:
1/2 cup thinly sliced Green,Red and Yellow Peppers each
1 Cup thinly sliced onion
2 tsp finely chopped garlic
1/2tsp ginger
2tbsp Ketchup
2tbsp Hot and sweet sauce
1tbsp Soy sauce
2tsp All purpose flour/maida(I ran out of corn flour)
1/2tsp Black pepper
1/2tsp Red chili powder(add more for spicier taste)
salt (in needed,Soy sauce is  salty)
oil

Method:
1)Gently mix together all the above ingredients for Meal balls.Do not over mix....otherwise the kheema balls come out tougher and chewy.Just mix till everything is combined well.
2) Brush  hands with oil. Keep a non stick pan with little oil on medium heat.
3) Take small amount of kheema mixture and roll into balls.Place the balls on the hot pan.Once they brown from one side, turn them.Keep a lid for 2 mins for them to cook.Turn from oil sides to brown them slightly. Drain well on paper towel.

 4) Heat 2 tsp oil. Fry the veggies in the oil along with ginger-garlic. Add 1/2tsp oil to the center of the pan, add the all purpose flour.Fry the flour in oil by stirring it for few seconds. Add water to the pan and add the sauces.
5) Add the rest of the spices and cook the Garvy till slightly thickened.
6) Just before serving, place the Chicken balls in the serving bowl and pour the curry on top.
Serve Hot with Rice or Rotis/Naan if you like!!


Monday, December 3, 2012

Chicken 'Rainbow' Kabobs with Chinese Dipping Sauce

So colorful, so tasty...you won't stop dipping and popping them in your mouth!
It was 'Diwali Firecracker Party" at 'J' kaka's house and the menu decided was 'Indo-Chinese". After much thinking...I decided to make my favorite "Baked Chicken Kheema balls" with a Chinese Dipping sauce.
 When entertaining a large crowd....I think..these work perfect as appetizers.You can make Indian, Italian, Chinese versions with the same recipe and just a few modifications.You can flavor them according to the occasion/theme and they will be mouth watering every time!!
For Indian version: Use Chicken curry masala, Ginger garlic paste
For Indo-Chinese version: Sambal olek paste, Ginger garlic paste, Kitchen King masala and serve with Chinese Dipping sauce
For Italian version: Italian herbs, cheese, crushed garlic

Recipe:
Ingredients:

1lb minced chicken/kheema
1 medium onion chopped finely
1tsp ginger garlic paste
1tbsp chopped cilantro
2tsp Roasted sesame seeds
2tsp Kitchen King masala
1tsp Sambal Olek paste
1tsp Ketchup
2tsp chili powder
1/4tsp turmeric
1tsp cumin-coriander powder
1/4tsp black pepper

1 egg
salt to taste
oil to brush hands

For Kabobs:
Green.Red,Orange,Yellow Bell peppers cut into small squares
White onion cut into small squares
Toothpicks

Method:
1) Preheat oven to 350F.

2)Gently mix together all the above ingredients.Do not over mix....otherwise the kheema balls come out tougher and chewy.Just mix till everything is combined well.
3) Brush  hands with oil
3) Take small amount of kheema mixture and roll into balls. Sprinkle some sesame seeds on top.
4) Place onto baking sheet lined with aluminum foil and sprayed with cooking spray
5) Bake for 30-35 mins till cooked through
6) Broil for 2 mins to get nice golden brown color on top.


 For serving: Place a Chicken Kheema ball,bell pepper and onion on each toothpick


Chinese dipping sauce
1/4 cup Ketchup
1/4 cup Maggie hot and sweet sauce
2tbsp soy sauce
1/2 tsp Chili powder
1/2tsp sugar
Some toasted sesame seeds.Mix the sauces and chili powder together.Garnish with sesame seeds and cilantro.


Friday, November 30, 2012

"Food for Thought"-- Do know know what will be on your table in the next few years???

 Do know know what will be on your table in the next few years???

In Vitro 'Lab made' meat? The weeds in your lawn will be your salad mix?? Which ethnic cuisine will reign supreme?? Fish Farming? Will you take a 'nutrition' pill or wear a patch???

A very curious...a very interesting read for all Food lovers:

THE TASTE OF TOMORROW by Josh Schonwald
http://www.amazon.com/The-Taste-Tomorrow-Dispatches-Future/dp/0061804215
 

After Diwali....after all the 'Faral' making...and 'going crazy' about blogging my creations....I came to a much needed break! I needed the break...BUT..... I think...As much as I was tired making the recipes...people got tired of seeing the links to those on their facebook ;) Sorry people....can't help you there!!
Will cook..Will Blog..and Will Share ;)

Anyways....
Josh Schonwald's "The Taste of Tomorrow"...was very interesting... got me thinking about "Future of Food'.What would we be eating...the trends ( The best of all..I found out there is a job called " Food Trendologist or Food Futurist"!!!) Sounds super cool right...discovering the trends in food...getting the first taste of the 'new' foods...predicting which trends will last...
But as super as it sounds...I believe it must be as difficult as well!!

From this book...I am on to a new read....Pamela Ronald and Raoul Adamchak's...."Tomorrows Table"
http://pamelaronald.blogspot.com/
This one is more about....Organic Farming and Genetics...the union of both for the bright future of farming...
Still haven't completed it...will see it it turns me into an "Organic Buyer"!


I will get back to blogging in the next few days. I am glad to have friends like you who visit TheSizzlingPan  and help me keep going:))

You guys are the BEST!!!

Deepti


Wednesday, November 14, 2012

"Treats for Diwali"- Pedha with Flower icing

It's the second day of Diwali....and it is "Padwa"..the festival of "husbands and wifes"!! I couldn't resist making these "pretty" looking Pedhas to sweeten M's  mouth after the "Ovalni"(Pooja).

To make these, I used the left over "Pedha dough"(3 minute condensed milk pedhas) from the "Pedha Diyas"(http://www.my-kitchens-aroma.blogspot.com/2012/11/treats-for-diwali-pedha-diyas.html) that
 I made couple days ago and made a simple butter-sugar icing to make those pretty flowers!

Ingredients:
Pedha dough (recipe below)
Icing (recipe below)
Decorating  Edible Pearls ( Bought them from 'Cake decorating section' of a grocery store)

Here is the recipe for 3 minute Pedhas:
http://www.my-kitchens-aroma.blogspot.com/2011/03/sweet-treats-3-minute-pedhascondensed.html
( I halved the recipe for these Pedhas)

Icing:
1/4 stick butter (at room temperature)
5tbsp powdered sugar (plus little extra)
few drops of orange color/ red and yellow color(mix 4 red to 2 yellow to make orange color)
few drops vanilla essence
Zip lock bag and icing tip

1) Mix the butter and powdered sugar till smooth and without any lumps.It should make 'icing' consistency) easy enough to be squeezed from zip lock bag.Add more sugar if needed.
2) Add the orange color and vanilla essence to the icing and mix.
3) Cut the tip of zip lock bag(small enough for the icing tip to come through). Place the icing tip inside.Fill the bag with orange icing.
4) Squeeze out icing in shape of a flower. One dot in the center and 5 dots around it.

5) Place one edible pearl in the center of each flower
6) Store in airtight container in the refrigerator for up to a week.


Monday, November 12, 2012

"Treats For Diwali"- Pedha Diyas

Wish You All a Very Happy Diwali 2012!!

Festival of Lights
 

What else goes 'hand in hand' as good as "Diwali and Diyas"??? After all it is called the "The festival of Lights".And so..I thought why not make my "star attraction" this Diwali...."The Pedha Diyas"!!
I used the "3 minute microwave pedha recipe" to make the basic Pedha mixture.(I used 1/4th portion of the recipe to make the Pedha dough for the Diyas.I will make regular Pedhas with the remaining mixture)
http://www.my-kitchens-aroma.blogspot.com/2011/03/sweet-treats-3-minute-pedhascondensed.html


Ingredients:
1 stick unsalted butter+ little to butter the molds
2 cups milk powder (Use Nestle Nido if you can find)
1- 14oz can Sweetened Condensed milk
2tbsp milk with saffron

Colored Sugar( I used yellow)
Edible colors
Toothpicks

Method:
1) Bring the butter to room temperature.
2) In a microwave safe dish, mix butter, milk powder, condensed milk and flavorings of your choice.
3) Microwave for 3 mins.At each 1 min interval, mix everything together.
4) Let it cool,then form into traditional round pedhas or mold into various shapes. 
5) I molded them into "Diya" shape
6) Used a toothpick to make the 'rim' design
7) Dip the toothpick in edible color of your choice and make designs on the Diya

8) Or dip a straw in the color and make design on the Diyas
9) Pour some colored sugar in the center of the Diya


"Treats for Diwali"- Bhajani Chakali

'Diwali Faral' isn't complete without these Spiral- Spicy -Crunchy Treats.....The Chakalis!! As kids, we would be waiting for that day..when mom would prepare the chakalis!! There was a "Chakali Factory" near by our house..they made the best crispy spicy chakali ever!!! I remember..the aroma making my mouth water...as we entered the road to the factory...
In Maharashtra, Chakali is made from a special 'Flour Mix' of various grains. It is called "Bhajani".It gives the Chakali that 'crispy-crunchy' texture and the authentic taste. People either have their own "family' Bhajani recipe or now a days you can buy them in any store.My mom used to make her own..fresh...for every Diwali!
After coming to USA, I am in love with the "K-Pra' brand Bhajani. It comes with it's own set of directions and makes incredible Chakalis.
I followed the steps on the Bhajani packet.No need to add even salt or chili powder.The seasoning is perfect!!
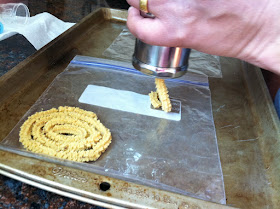
1) After I made the Bhajani dough...'M'  helped me make the Spirals with the Chakali maker.

2) Fry the Chakalis on medium flame.Too high will burn them.Too low will make the spirals open and break the chakali (I had couple batches break :(

3) Fry till they are golden and crispy.Drain on paper towel.


If you have breakage of chakalis.....the "Tukda Chakali"(as they sold back in Pune) is delicious finger food too!
I made the "tukta chakali" into a "Rose"  like presentation  :))