Popular Recipes

Wednesday, December 23, 2020

Dark Chocolate and Almond Scones


 Holiday Baking is in full swing!! Every break/vacation,  I promise myself to create a new recipe and upload it on the blog site. This winter break it had to be something sweet, chocolatey, and baked for the Christmas holidays! 

So here are the dark chocolate and almond scones that we enjoyed baking together as a family today. They are perfect textured (the little ones did a great job of massaging the butter onto the flour to get the perfect crumbly 'scone' texture 😍) are mildly sweet, and have slight nuttiness from the almonds. 

Ingredients:

2 and 1/2 cups All-purpose Flour

3/4 cups Granulated sugar

1/2 cup thinly sliced almonds

1/2 cup dark chocolate Hershey's cocoa powder

1/2 cup heavy cream/ whole milk

2 and 1/2 tsp Baking powder

6 Tbsp Unsalted butter (very cold)

1 egg

1/4 tsp salt

2-4 (70% chocolate) squares for the top drizzle

Method:
1) Preheat oven to 375F.
2) In a large bowl, mix together flour, sugar, salt, cocoa powder, baking powder.
3) In a small cup, beat 1 egg. Keep aside 1 tsp ( for egg wash later). To the rest of the egg, add heavy cream/milk. Mix together.
4) Cut the cold butter into small pieces and combine with flour- sugar mixture. Use fingers to blend the butter into the flour. The mixture should look like coarse crumbs. ( Little pieces of butter should be still seen in the mixture). Add the sliced almonds.
5) Add the egg-cream mixture to the flour. Stir until combined. Do not over mix.

6) Knead the dough lightly on a floured surface. Make 3-4 large balls. Roll out each ball of dough or pat the dough into a circle. About 1 and 1/2 inches thick. Cut into 6 or 8 wedges like pizza.

7) Place the scones on a lightly greased baking sheet. Keep them apart. They will spread a little while baking.
8) Mix together 1 tsp egg and 1 tsp milk. Beat together. Brush onto the scones to get a 'shiny' appearance on baking.
9) Bake at 375F for 15 mins or until lightly browned.

10) Let them cool completely before taking them out from the baking sheet. 
11) Melt the chocolate squares and drizzle the melted chocolate onto the completely cooled scones. Store in an airtight container.

Enjoy the sweet crumbly Scones flavored with dark chocolate and textured with almondsπŸ˜‹ Happy Holidays!!!

Tuesday, October 13, 2020

Baby Red-potatoes and Pearl-onion Butter Masala


One of the items on my to-do list for this week's Fall break was to whip up a New recipe and write it up on the blog site (http://www.thesizzlingpan.com/). Mission accomplished! 😊 Made this super delicious creamy curry with 'Butter masala/Makhani sauce' and Red baby potatoes and tiny pearl onions. 

For quite sometime, I had wanted to make this curry with baby potatoes and pearl onions. I remember my mom making similar curry back in Pune when I was a kid, though she made it with different style of curry. This kind of creamy sauce works great for this curry and made an extra special lunch treat for everyone served along with Parathas and Ghee Jeera rice.

Recipe:

10-12 baby red potatoes, washed

1 cup pearl onions (I used frozen pearl onions)

Butter masala /Makhani sauce:

2 medium onions sliced

2 medium tomatoes chopped

3 cloves garlic

1tsp grated ginger

1/2 cup milk

1/4 cup heavy whipping cream

2 tsp Ghee/ Butter

2 tsp MDH Shahi Paneer masala

1 tsp red chili powder

1 tsp sugar

Cumin, cinnamon stick, Big Elaichi, Kasoori Methi, salt, oil

1) Saute the sliced onion till golden with little oil, Add tomatoes and saute till cooked and slightly browned. When cooled, make into paste with little water, ginger and garlic.

2) Saute the above masala with cumin, cinnamon, elaichi, Shahi paneer masala, red chili powder for few mins till thick on some oil.  Add the milk and cream. Mix and cook further for few mins. Add salt, sugar and crushed kasoori methi. Finish by topping with ghee/ butter.

3) Pierce the baby potatoes on all sides with a knife. Put the baby potatoes in a microwave safe bowl with some water. Microwave for 3 mins to cook partially.
4) Saute the partially cooked potatoes with some oil/ butter. Add the pearl onions and saute gently (make sure they don't break)
5) Add the Butter masala/ Makhani sauce to these sauteed potatoes and pearl onions. Add little water/milk and boil for few mins till potatoes cook fully, but not mushy. Check with inserting a knife to check the 'done-ness' of the potatoes. Finish with more butter/ ghee and kasoori methi.

6) Serve hot along with Naan/ Chapati/Parathas and Ghee Jeera Rice. Enjoy! πŸ˜‹


Tuesday, June 30, 2020

Designer Uttapams and Idlis

Designer Uttapams and Idlies πŸ˜› dressed up in very warm summer flowery theme! 
Used Idli batter with 1/2 Brown rice and 1/2 Basmati Rice to make these. The vegetable designs made these look extra special and beautiful! πŸ€πŸŒ»πŸŒΏπŸŒΈ
1) Spray the Idli pan with oil spray. Or use 
Non stick pan for uttapams. 
2) Arrange the vegetables in Idli stand - I used carrots, cilantro, onion, tomatoes. Put batter on top of the vegetables for idlies. The batter needs to be little thick than usual and laddled carefully. Steam for 15-20 mins like usual. Remove the idlies carefully after completely cooled. 
3) For uttapams, place batter first, spread into thick uttapam. Then arrange the vegetables. Add few drops of oil on the sides. Cook covered till slightly brown on bottom side. 

 
Designer idlies and Uttapams are ready! πŸ˜
••• Full Brown rice Idli/ Dosa recipe:
http://my-kitchens-aroma.blogspot.com/…/brown-rice-idlis-an…

Paneer and Zucchini Roll-ups


“Paneer-Zucchini Roll-ups”
These grilled roll-ups make a perfect summer appetizer...are amazingly delicious...and look stunning! πŸ˜‹

Heighten your zucchini experience by bundling up either paneer or chicken in thin strips of zucchini and then grilling them on a grill or a skillet.

*** Paneer version:
1) Cut paneer into medium cubes. Marinate for 30 mins with a marinade of thick yogurt, Tikka masala powder, red chili powder, turmeric and salt. 
2) Make zucchini strips with veggie peeler
3) Wrap the marinated paneer cubes with zucchini strips and secure with a toothpick.
4) Grill on griddle/ skillet/ grill with oil spray - on horizontal surface and also vertically till slightly browned.
Serve hot along with lemon slices. πŸ˜‹

*** Chicken Version:
http://my-kitchens-aroma.blogspot.com/2009/12/appetizers-chicken-zucchini-roll-ups.html?m=1

Zucchini And Red Pepper- Pesto Pizza


“Zucchini and Red Pepper Pesto Pizza”
It was Father’s Day and kids had made plans for a Homemade Pizza for Daddy☺️ ❤️
We made a half whole wheat-half bread flour crust and topped it with Basil Pesto, zucchini & red pepper slices and cheese. 

Zucchini on pizza might sound odd... but after trying Papa Murphys Thai pizza in the past that has zucchini as a topping.... It tastes great and we like it! 
The crust came out perfectly spongy on the inside and crusty on the outside.

Pizza Crust: ( I made it in bread machine)
Makes a 12 inch thick crust pizza

1 and 1/4 cup warm water
1.5 tbsp olive oil
3/4 tsp honey
1.5 tsp salt
1.5 cups Whole wheat flour
1.5 cups Bread flour
1 and 3/4 tsp yeast

1) Mix and Knead all ingredients into soft dough and keep in warm place for 1.5 to 2 hrs.
2) Pre heat oven to 415F
3) Spread and roll out the dough into oiled pizza pan.
4) Apply Basil pesto evenly.( I used store bought) 
5) Top with thin zucchini and red pepper slices. Season with Italian/ pizza herb seasoning, red chili flakes, black pepper and shredded cheese. 


6) Bake at 415F for 20-25 mins.
Enjoy hot out of the oven....Delishhhhhh!!! 
πŸ˜‹

Chicken Kati Rolls/ Chicken Frankies


“Chicken Frankies/ Kati Roll” 
Boneless Chicken marinated in spicy Indian masalas, pan fried till slightly brown and then wrapped up in flour tortillas/ rotis/ chapatis along with pickled red onion, Cilantro-Chili chutney. Deliciousness unbounded! πŸ˜‹πŸ˜‹

Today, I used a shortcut marinade of thick yogurt, chicken tikka masala, red chili powder, turmeric, cumin, ginger-garlic paste, mint powder and salt for the chicken and used store bought Flour tortillas as wrap. Made dinner prep so much easier! 

*** Full authentic recipe version can be found here:
http://my-kitchens-aroma.blogspot.com/…/everyday-cooking-ch…

Tuesday, June 16, 2020

Dark Chocolate Cake with Neon-Pink Whipped Cream Frosting


Special birthdays deserve special homemade cakes!πŸ’• We had a special milestone birthday of our little one and celebrated with this very pink-princess like cake😊

This year her demand was for a chocolate cake and hence baked a dark chocolate cake with neon pink colored whipped cream frosting. I love the stark contrast of dark chocolate with neon pink. The cake looks gorgeous in that combination!


Dark Chocolate Cake (Makes a small 6 inch cake)
1 cup All purpose flour
3/4 cup Sugar
1/3 cup Yogurt (whole milk)
1/3 cup Water
1/3 cup Unsweetened dark cocoa powder
1/4 cup Unsalted butter
1 Egg
1 tsp Bru instant coffee powder
3/4 tsp Baking powder
1/2 tsp Baking soda
1 pinch salt

1) Preheat oven to 350F. Layer 6 inch circle cake pan with parchment paper on the bottom. Coat with oil/butter on the pan sides and dust with some flour to avoid the cake sticking.
2) Beat butter, egg, salt and sugar till light and fluffy. Add yogurt, water and rest of the ingredients. Beat till well mixed. Do not over mix!
3) Pour into the loaf pan and bake for 30-40 mins. Check with toothpick. It should come out clean.
4) Let the cake cool completely.
( ** Or you can bake the cake the day before to save time)

Neon-Pink Whipped Cream Frosting
 (I add some cream cheese to stabilize the whipped cream and cut the sweet taste)
2 Cups Heavy Whipping Cream (chilled)
1/2 cup softened cream cheese
4 tbsp sugar (Add more for sweeter taste)
2-4 drops Neon Pink gel food color (Depends on desired color)
Pink and White Sugar pearls for decoration
(** This makes little extra frosting than needed. Any leftover frosting can be frozen in freezer safe containers)

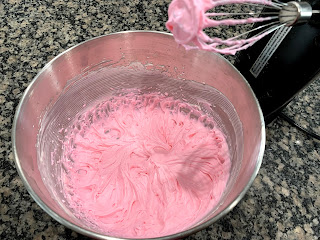
1) Beat the cream cheese, sugar and heavy whipping cream in chilled bowl till stiff peaks form.
Keep aside about 1/2 of the white icing in a bowl in the refrigerator
2) Add neon pink gel color to the rest of the icing and beat for few seconds. Fill in piping bag with large rosette piping nozzle and store in refrigerator till ready to use.

Cake Assembly:
1) Place the cake on serving platter/ cake stand that can be refrigerated. Coat the completely cooled cake with thin layer of white whipped cream frosting.This is called 'crumb coating' and helps with the next layer of smooth frosting without any cake crumbs. Keep the cake in the refrigerator to set for 30 mins.
2) Layer the cake with pink frosting on bottom and white of top and side. Smoothen it out with icing knife/ spatula.
3) Pipe rosette pattern with pink frosting on the top
4) Cover the entire top surface with rosettes. Decorate with pink sugar pearls on top and white sugar pearls on the bottom/sides
5) Refrigerate the cake after frosting/ decoration is done. Whipped cream frosting starts to soften at room temperature, so the cake needs to be stored in refrigerator.

Tuesday, June 9, 2020

Raspberry-Blackberry Chip Ice cream

Summer means lots of Berries and lots of Ice cream! I love the 'Black Raspberry Chip' ice cream from Graeter's and also by the 'Homemade' brand which comes very close to Graeter's in flavor.
I didn't have any Black raspberries, so tried to make my favorite flavor of ice cream with combo of  Red Raspberries and Blackberries and Dark chocolate with almonds. The combination worked well and the ice cream turned out super awesome and Yumm!
This ice cream recipe is super easy to make and the ice cream comes out perfect textured! You can use Heavy whipping cream+ Condensed milk and add pretty much any flavor you want to make your very own delicious homemade ice cream!
Ingredients: (Makes about 2 cups or 4 small scoops)
1/2 cup (heaped) Red raspberries+ Black berries
1/2 Cup Heavy whipping cream (unsweetened), chilled
1/4 cup Sweet condensed milk
2 tbsp milk (cold)
2 tbsp chopped dark chocolate with almonds (I used Hershey's Dark Chocolate with almonds bar)
3 tsp sugar
Edible sugar pearls (optional) for decorating the glass
Method:
1) Add the berries to a pan. Add 3 tsp sugar and cook for 3-4 mins till berries start to cook. Crush the berries with spoon. ( I didn't mind the tiny berry seeds and pulp in the ice cream. You can strain the puree if you don't like pulp/seeds) The berry sauce will reduce to about 1/4 cup. Let the berry puree cool down completely and then refrigerate for 15 mins.
2) Mix the cooled berry puree, condensed milk and normal milk in a bowl.
3) Beat the chilled heavy whipping cream with electric mixer till stiff peaks form. 1/2 cup heavy whipping cream will yield 1 cup whipped cream after whipping is complete.
 Reserve 1 tsp whipped cream for decorating the glass later. Save it in the refrigerator.
4) Gently fold in the whipped cream and chopped dark chocolate into the condensed milk-berry mixture.
5) The mixture will be thicker than smoothie consistency. Pour into freezer safe container. Add extra chopped dark chocolate on top.
6) Freeze for atleast 7 hrs for perfect consistency of the ice cream
7) Serve chilled in ice cream glass with extra berries and sprinkle some chopped dark chocolate 
Optional: Apply the reserved whipped cream as a glue to the rim of the glass. Stick the edible sugar pearls to the rim with whipped cream to decorate the ice cream glass.
Enjoy the delicious treat of homemade ice cream !