Popular Recipes

Wednesday, April 4, 2012

"Nutritious and Delicious"- Homemade Cereal Bars


 With these really 'nutritious' cereal bars....I start the new section in the blog "Nutritious and Delicious".
My friend 'G" is really into eating nutritious,organic and homemade foods. She is a big inspiration for me to get up and make my own whole grain cereal bars and  'Healthy' cookies ( recipe coming soon). All these years M has been taking a cereal bar for breakfast, but never did I think of making one at home!! It was a eye opener the other day....when I met G...who by the way is a 'superwoman'...with so much energy and enthusiasm..you can hardly hold her hand in what all she can accomplish in a day!! Hats off to her!!
Here is the link where I got the idea for this recipe-

Ingredients:
1 and 1/2 cup Whole grain Quick Oats
1 cup Rice Crispies
1/8 cup Flax Seed meal
1/4 cup each  Nuts -Pistachios,Almonds
1/4 cup Raisins
1/8 cup Dark chocolate chips
1/4 cup Light Brown sugar
1/4 cup White sugar- (you can use all brown sugar instead)
1 tbsp Honey
1 Egg
1tsp Vanilla
1/4tsp Cinnamon
1tbsp Canola Oil
1 tbsp All purpose flour
1/4tsp salt

 * You can add other nuts like walnuts/pecans or fruits like dried cranberries/cherries etc.

Method:
1) Preheat oven to 350F. spread the oats and nuts on a cookie sheet and warm in the oven for 8-10 mins...until slightly toasted. reduce temperature to 325F. Coat a 8*11 inch pan or 9* 9 inch pan with aluminum foil.Spray with nonstick cooking spray.
2) Beat the egg.Mix oil, sugar and all of the above ingredients, stir well.

3) Press the mixture in the coated pan.


4) Bake at 325F for 15- 20 mins ....till slightly golden brown.
5)Let them cool and then cut onto bars with a oiled sharp knife
6) Store in airtight container.Makes 12 bars.
Your own nutritious and delicious -chewy and nutty cereal bar is ready when you want to snack!!!


Tuesday, March 20, 2012

"Appetizers"- Carrot Masala Bread

Someone please tell me the restaurant that was on the corner of FC Road (Pune) and served this spicy delicious 'masaledar'  Masala Bread....or more so...Masala Pav!!! I am trying to recollect the name of this small restaurant and I am not being able to:(  I  still remember the taste of this buttery spicy masala pav though!! The taste still lingers in my mouth...
Those good old college days...you didn't care where you ate...what you ate.....how much you ate....how many calories it had....how 'dirty' that place was....how often you ate out....you cared for nothing....
All you did was..have fun!!!
Don't you want to revisit that life? I feel like!!

Since, it isn't really possible to go back(unless someone really has a time machine!!)....I am revisiting my college days...by having this Spicy tempting 'buttery' masala pav!!
The original one doesn't have carrots..but to 'up' the nutrition factor and give the masala a little 'crunch' I added some carrots to the mixture.
Ingredients:

8 slices of white bread( use 'pav bhaji' bread for original masala pav. I used whole grain white bread)
1 medium onion chopped
1 medium tomato chopped
1 carrot shredded
2cloves garlic finely chopped
1tsp red chili powder(add more for spicier taste)
1/2tsp garam masala
2tsp ketchup
1/2tsp cumin
1/4 cup chopped cilantro
salt
oil
butter(amul butter if you have)

Method:
1) In 2tsp oil fry the cumin, onions,garlic till tender. Add the tomatoes and fry till soft.
2) Add  carrots, chili powder,salt,ketchup,garam masala.This mixture should be spicy and little tangy from the tomatoes and ketchup.Add the chopped cilantro and take off the heat.

3) To a slice a bread apply butter.On the other slice apply the carrot masala thinly.Make a sandwich
4) Toast the sandwich on low flame on little butter till golden brown and delicious.

5) Slice into triangles before serving.Serve hot!!!
I am sure you will love this....even my  little "E' and 'A' tried it and loved it (I made it less spicy for them )!

Monday, March 12, 2012

"Pat a Cake"- Eggless Strawberry Cake

"Fresh Strawberries and Cream"...remember that??? I am sure you must have had that in Mahabaleshwar!!! I was thinking on the same lines....

Strawberry cake.....with creamy....Condensed milk! How good will that taste? Sweet Very Berry heaven ..on the plate!!
The only thing missing was ....fresh whipped cream to top the cake...(I didn't have any in the fridge...but you sure remember to top this cake with the whipped cream!!!)

Ingredients:
1 and 1/2 cup All Purpose flour
3/4th cup sugar
1/2tsp salt
1tsp baking soda
1tsp vanilla extract
1/3rd cup Canola oil
1tbsp vinegar (Add just few drops less than 1tbsp.....it prevents that 'vinegar' taste)
1/2 cup Cold water
1/2 cup Sweet Condensed milk
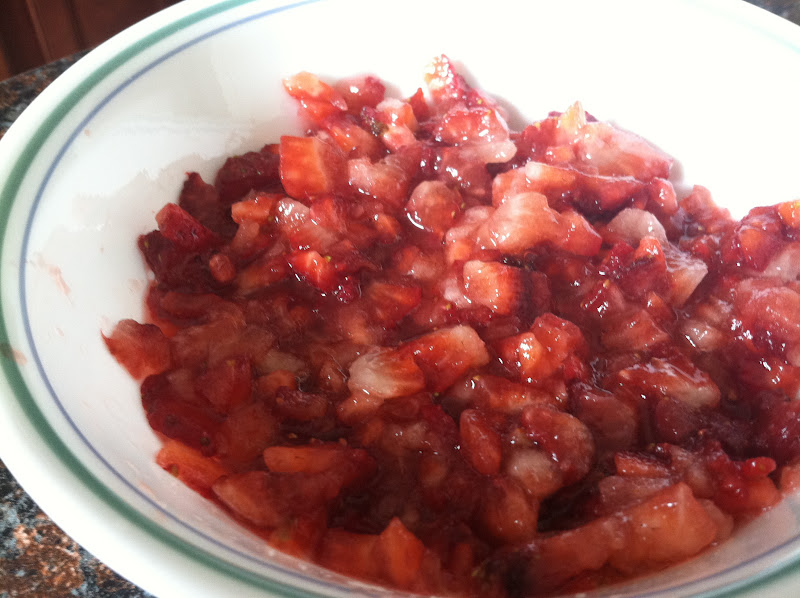
8 fresh strawberries chopped finely and macerated in 4tsp sugar
Some strawberries for garnish
Whipped topping(optional)

Method:
1) Finely cut 8 strawberries into cubes.Add 4tsp sugar.Macerate for 30 mins.
2)Preheat the oven to 350F (preheating is very imp). Grease the 8 inch round pan with vegetable shortening. Apply liberally in all corners.Dust with all purpose flour to coat the pan.
3)First sift flour, sugar separately.Then by a spoon add to the measuring cup to measure exact amounts.Level with a knife.DO NOT pack the flour into the cup.The ratios will change and the cake will not come out as good.
3) Mix wet and dry ingredients in separate bowls. Then mix them together.Add the macerated strawberries.

 4) Mix them together in a single direction.Bubbles will appear as vinegar reacts with baking soda.Do not over- mix.But all the lumps should be gone
5) Bake in preheated oven for 20-25 mins.Do not open the door for first 20 mins atleast.
6) Check with a tooth pick, if the cake is done.The inserted toothpick should come out clean. Cut the cake after cooling.

7) Flip on a serving platter carefully and serve with fresh strawberries and whipped cream topping(optional)


Friday, March 9, 2012

"Aroma From a Guest Kitchen"- (Guest-Navami Venugopal)- Pickle Mania and Anika's Playdate Burger!

Navami and I got to know each other and got along together ....due to...any guesses?? Yes...it is our interest in Food!! Navami is an excellent cook and will always 'wow' you with her flavorful and variety of cooking.
She will always have a fabulous spread ready when she invites you over.

Spot the Mango Pickle!!! No Prizes!!!

One of my favorites at Navami's, have been the variety of mouthwatering pickles she makes.She shares some here:

Pickle mania...


Instant pickles:3 at a time Tada!!!
(Life span of about 4weeks if stored in fridge ,covered and if scooped
out with a dry spoon everytime)

Washed Raw Mango -1(cut into tiiiiiny cubes along with the skin if not bitter)

De skinned and washed Raw papaya-1-Cut into Juliennes-1inch long

Scraped n washed Carrots-4 long ones-Cut into Juliennes-1inch long

Pitted dates-(Optional)-10 nos-finely chopped

Vegetable oil-5 tablespoon+ 1 teaspoon

Red chilly powder-12 teaspoon(4 for each pickle-You can increase depending on the required spice level)

Roasted methi seed powder-1 teaspoon

Distilled white Vinegar-4tablespoon

Salt -About 2 tablespoon for each pickle.Feel free to adjust depending on size of the fruit/sourness of the mango or vinegar.

Mustard seeds-9 teaspoon-Approx 3 for each pickle

Sugar-1 teaspoon each for Carrot+date and Rawpappaya pickle only

Asafoetida(Hing)-1 teaspoon(1/2 teaspoon for Mango and Papaya pickle only)

Curry leaves-6 leaves cut into half

Dry Bowls-3

DryLadles-3

Ensure to wash and dry vegetables and no entry !!!! to water in any form as you start the journey.Of course you can gulp down some and use to wash your eys while roasting Chilly powder.Keep a towel /tissue handy
to wipe hands in between.

Assemble cut Mango,Raw papaya and carrot + dates in 3 different bowls.

Add salt to each of the bowls, mix well and keep aside.Add sugar to the Carrot+date and raw papaya bowls.Mix well with respective ladles.

You are gonna get 3 final products in one go.So proceed with caution hereon.

Mix2 tablespoon each of vinegar to the Raw papaya and Carrot + date mixture and use your hands to mix for the extra flavour.

Next add methi powder to the mango mixture,mix well.

Now pour oil into a kadai and add mustard seeds.

On spluttering add the whole chilly powder,mix well in the oil within 45 seconds take it off the gas and keep mixing.This is to ensure the chilly powder doesn't get burned.This is the only difficult part in the whole process.If burnt the chilly powder will give a bitter taste.Roasting like this adds that extra taste and prevents the pickle from getting spoiled.

Mentally divide the cooled Chilly mixture into 3 portions Add 1 portion each of this mixture to the raw Papaya and Carrot n date mixture .

Take small kadai.. pour a teaspoon of oil and saute the curry leaves(washed and patted dry) along with the hing.Add half quantity to the Raw papaya pickle.

Mix the rest half with the left over chilly mixture and add it to the raw mango.

Transfer pickle to dry storage containers.

These pickles can be enjoyed after an hour!

Voila...3 crunchy pickles for any party.

Add the raw papaya pickle to a normal lettuce salad or normal peanut

masala and savour the difference.

Carrot and date-Add to any burger!!!

Salsa:Mix n match the papaya and carrot pickle with avocado,a dash of lemon,onion and coriander leaves.

Mango pickle:Enjoy with nice Yogurt and Rice or Sambar and rice.

Note:Just divide the portions and make individual pickles as per convenience

Disclaimer:My favourites ...so can't go wrong for atleast few taste buds!Not able to find pics ...so excuse me plssss

  • Navami shares another of her recipes....
Anika's playdate burger!


Serving:4 sliders n some extra sweet potato finger chips


Ingredients:
Small slider buns
1 sweet potato(Will make about 35 fingerchips)
Mayo-3 teaspoon
Any fruit preserve(I used fig preserve.Remember to finely chop thefruit in the preserve)-3 teaspoon
Roasted cumin powder(optional)
Finely chopped coriander leaves-1 teaspoon
Ketchup-1 tablespoon
Sour cream-1 tablespoon
Olive Oil-1 tablespoon
Lettuce-Cut to the size of the buns
Salt
Pepper
One baking sheet/tray
Olives/Cherries and Toothpick for decoration

Filling
Peel and Cut fingers out of the sweet potato.Set the oven to 400.Coat the sweet potato fingers with Olive oil,Salt and pepper.Spread on a baking sheet and bake for about 30 minutes or as crunchy as you want.Toss it on a kitchen tissue for cooling and to absorb extra oil .

Sauce on the bun-
Mix Ketchup,Sourcream ,Mayo,2 teaspoon of Fruit preserve and Coriander leaves.Add salt to taste.Let it stay for10 minutes.

Sauce on the side-
Use the leftover sauce from above and add the roasted cumin powder and remaining amount of Fruit preserve.

Assembling-
Toast buns on a Tava.Put lettuce on the bun.(Placing the lettuce prevents the bun from sogging up much if you are preparing it in advance)Spread a dollop of sauce and lay the finger chips (about5-6)on top.Top it up with the paired bun.Insert a toothpick with Olives/Cherries.Serve a dollop of the sauce on the side with the burger along with the remaining chips.Serve with a smile :-)

Note:Proportions for the ingredients for sauce can be altered to suit taste.Can be made spicy by adding Cayenne pepper or tiny bits of green chilly.

Disclaimer:You will need to have a khatta -meetha liking!!!

Friday, March 2, 2012

"Fusion Cuisine"- Corn Kulchizza!! / Corn pizza on a Onion Kulcha

Kulchizza!!!
How cool is that??? Yes, I came up with that name!!
 A pizza made with "Kulcha" as a crust.....Kulchizza!
Yesterday ,we had our weekly playdate for the kids and I had made "Masala Butter Corn" on toast for the kids. I had made plenty of the corn and we had leftovers for dinner.
Masala Butter Corn......I had it when I visited India last month.At 'City Pride' theater..they had a stall which served this. They steamed the sweet corn kernels, added chili powder,salt,chaat masala, butter and a squeeze of lemon.


The steaming hot- sweet corn with all that spicy masala..ummm umm yummm.....definately made the movies more interesting!!
For dinner......I put together this Kulchizza with frozen Kulcha ,the masala butter corn, ketchup,some chopped onion and cilantro and cheese on top.
Since the Kucha is already stuffed with onion and spices....it makes a very flavorful pizza base/crust.
You can top it with any toppings of your choice.

Ingredients:
Masala Butter corn---
2 cups frozen-(thawed to room temp) corn kernels
1/2tsp chili powder
1/2tsp kitchen king masala
1/2tsp chaat masala
1/4tsp mustard seeds
1tsp oil
salt
1tsp butter

Pizza:
4 Onion Kulchas
8 tsp Ketchup
1/2cup chopped onion
4tsp chopped cilantro
1/2cup shredded cheese

1) Masala Butter Corn=Heat 1tsp oil, add mustard seeds,corn, salt, ,chili powder, masala etc. Sir fry till properly heated.Add the butter.
Serve this as is with a squeeze of lemon or chopped raw onions and cilantro.

2) Kulchizza-
Heat a nonstick pan on low heat
Place a kulcha on the pan.Spread 2 tsp ketchup, 1tbsp masala butter corn, onions, cilantro and shredded cheese.

3) Cover with lid and bake till cheese melts and the kulcha crispens on the bottom
Serve hot hot hot!

Thursday, March 1, 2012

"Aroma From a Guest Kitchen"- (Guest -Shyam Jugade)- Bread Wada

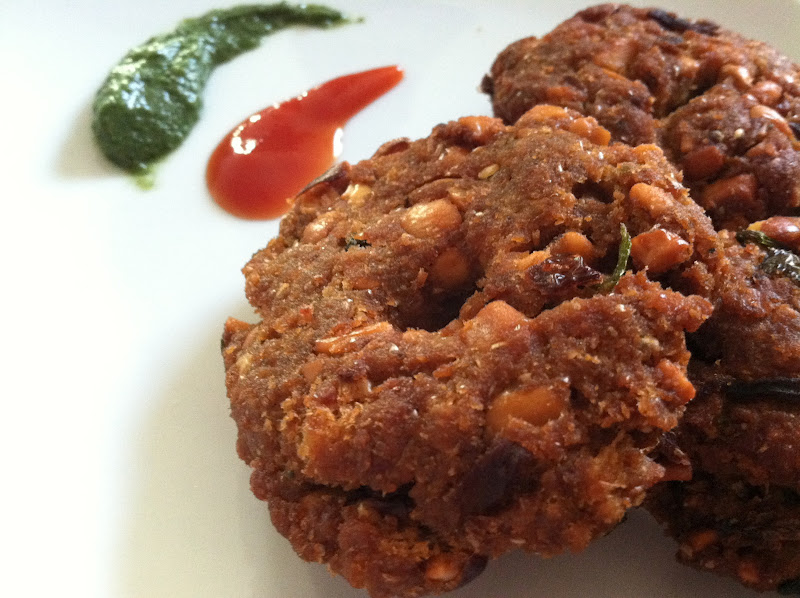
Looks Mouthwatering...isn't it???
Yet another masterpiece from Shyam kaka! He had shared this unique "Spring onion and Egg Pakoda" recipe before- http://my-kitchens-aroma.blogspot.com/2011/10/aroma-from-guest-kitchen-guest-shyam.html and Yesterday....he amazed me with these golden crispy-crunchy-spicy-nutty Bread wadas!
Kaka loves to try out new recipes and this was one such trial and it came out super delicious!!

I couldn't even tell.......these were made with bread!!! They were so unique in taste.
You can mould these with a hole in the center like "medu wadas" or just like plain wadas. The texture is so crispy-crunchy you will surely make everyone wonder....how they are made!
The nuts/ cashew makes them nutty and gives them a extra crunch...


Shyam kaka said this recipe comes from Chef Harpal Singh Sokhi.
Here is his recipe video from Youtube-
http://www.youtube.com/watch?v=C4VTOOanj7s

You know now.....what I am making for the next Potluck party!!


Monday, February 27, 2012

"Sweet Treats"- Easy Mango and Coconut Milk Sorbet

It was yet another send off ....for our friends P and G this time....
I had planned a thai menu from start to finish.I made Green Curry(http://my-kitchens-aroma.blogspot.com/2011/10/everyday-cooking-thai-green-curry.html), Pad Thai, Tofu Stir fry(http://my-kitchens-aroma.blogspot.com/2009/12/appetizers-thai-stir-fried-tofu.html), Thai iced tea(http://my-kitchens-aroma.blogspot.com/2011/09/sweet-treats-thai-iced-tea.html) and to end the meal.....Cool, Sweet, luscious.....Mango and Coconut milk Sorbet.

When I was looking for thai dessert recipes....this one came up.It was similar to the Mango ice cream I had made before.(http://my-kitchens-aroma.blogspot.com/2011/08/sweet-treats-quick-easy-delicious.html) It was pretty easy to make and was sure it would not disappoint on the taste front!

Ingredients:

2 and 1/2 cups Alphonso Mango Pulp
1 cup Coconut milk
1/2cup sugar
1 -8oz can of whipped topping

Method:
1) Mix the mango pulp, whipped topping, sugar and coconut milk together till well blended
2) Pour the mixture in small cups for individual serving or a big container for freezing.
3) Freeze for 6 to 8 hrs
4) Serve with a drizzle of Mango pulp or fresh cut Mango.

You will love the sweet coconuttty mangoey dessert to end the perfect Thai meal!

Friday, February 24, 2012

"Pat a Cake"- Dinoco Car Cake

It was little 'A's 2nd birthday last month...and like my 'E' he is a BIG--- CARS fan too!!! What else could make a little kid happy on his birthday than to have a cake shaped like his favorite toy???
We (I mean "M' had a lions share in this cake...he drew the car for me and helped with the icing too!! ) baked this 'Dinoco Car Cake" with a base of eggless orange cake with plain vanilla frosting.
 Ingredients
1 and 1/2 cup all purpose flour (sifted)
3/4th cup Granulated Sugar
1/3rd Cup Canola oil
1/4 th CUP of cut up canned Mandarin oranges in 'light syrup'(cut into tiny pieces)-[Add upto 1/3rd cup for more orange flavor]
1tsp Baking soda
1/2tsp salt
1 tbsp Vinegar
1/2 cup fresh orange juice
1/2 cup 'light syrup' from the canned mandarin oranges
Orange zest of one orange(add more for stronger flavor)


 Icing: 1 can ready plain vanilla frosting and food colors and food pen/markers, few M and M's

Method:
1)Preheat the oven to 350F (preheating is very imp). Grease the 8 inch round pan with vegetable shortening. Apply liberally in all corners.Dust with all purpose flour to coat the pan.
2)First sift flour, sugar separately.Then by a spoon add to the measuring cup to measure exact amounts.Level with a knife.DO NOT pack the flour into the cup.The ratios will change and the cake will not come out as good.
3) Mix wet and dry ingredients in separate bowls.Add the chopped up mandarin oranges and 1/2 of the orange zest to the batter.Save the remaining for the glaze.
4) Mix them together in a single direction.Bubbles will appear as vinegar reacts with baking soda.Do not over- mix.But all the lumps should be gone
5) Bake in preheated oven for 20-25 mins.Do not open the door for first 20 mins atleast.
6) Check with a tooth pick, if the cake is done.The inserted toothpick should come out clean.

7) Flip on a serving platter carefully

Icing and shape cutting:
1)  Choose a picture of the Dinoco car and draw it on a paper to use as a stencil to cut the cake


2) Place the car shaped paper stencil on the cake and cut the outlines.With a food color marker draw the lines on the cake to make it easy for icing
3) Mix food colors with the vanilla frosting in different bowls to get the colors of your choice.We used blue, grey, white,red as main colors. Carefully spread the icing on the cake in between the drawn lines

4) Remark the lines with food pen/marker and decorate with M and M's.
5) Vromm Vrooommm the cake is ready to RACE!!!

Sunday, February 19, 2012

"Everyday Cooking"- Tandoori Spiced Grilled Tilapia

I am back from a wonderful vacation to Pune,India.I had a great time and the most flavorful and delicious food during my vacation.Tried many new things and revisited old memories by having food that I loved through my childhood years. So...after coming back....my 'tastebuds' are still  jet lagged and demand the same flavorful food here!!!!
Tilapia is one of my favorites fishes here in USA.For a quick dinner last night, grilled this easy but spicy and tender tilapia fillets.

Ingredients:
 3 Tilapia fillets
 1tsp Tandoor Chicken masala
1/2tsp red chili powder
1tsp lemon juice
1tsp water
1/2tsp salt
1tsp oil
1tbsp chopped cilantro

Method:
1) Was the tilapia fillets and dry with paper towel.
2) Mix together tandoori chicken masala, chili powder,salt,lemon juice,water,chopped cilantro and make into a paste.
3) Marinate the fish with the paste for 15-20 mins

4) Heat a grill pan and spray with nonstick spray.Grill the tilapia 2-3 mins on each side
5) Serve hot with extra dash of lemon and some side dish. Brush with ghee for added flavorfulness!